|
These are the DaVinci Resolve tips I wished I knew when I was getting started. After a career of many years in high tech, I decided to do a big career shift into film. I am currently enrolled in the Motion Picture Arts Program at the Recording Arts Institute of Saskatoon (RAIS). It’s a wonderful program that I highly recommend. In my new ideal role as a film producer, RAIS has provided me with a firm understanding of many of the key roles in film, practical skills with many current filmmaking technologies, and how they come together to make magic happen. Part way into the program, I decided to shift my focus away from Adobe Premiere and After Effects and dedicate myself to learning DaVinci Resolve 15. My learning goals at RAIS are unique from the other students, who are being prepared to find jobs at local studios and projects and need Adobe skills to do that. To become a film producer, these technical skills are less important, so I could choose a different path for myself. I’ve since completed a few small projects (including a 4m music video and a 10m final project entitled The Five Rules of Weed). This experience has led me to become a huge DaVinci Resolve fan – although there are things about the experience that leave a lot to be desired that I will comment on throughout. In this article, I’d like to share a few important lessons I’ve learned about:
(In future articles I’ll dive into Fusion compositing, Fairlight, Color, and Delivery.) Before I dive in to my lessons learned, I’d like to think big for a moment, and comment on what I believe is a potential fundamental shift in the way indie films (not major motion pictures) are being made. A Paradigm Shift in Indie FilmmakingOver the past 25 years, software engineering (my recent career) has gone through a paradigm shift: from a top-down, waterfall-based mindset that takes forever to deliver value to customers – to an agile, team-of-peers approach that focuses on delivering value quickly while iterating. I see the potential for a similar shift in filmmaking, thanks to software like DaVinci Resolve. There are a few key moments in film creation that make agility challenging, such as:
An indie team that centers all their workflow around DaVinci Resolve for ingest, editing, sound, color correction, and delivery can avoid many agility killers – and deliver value to viewers much more quickly with a well-rounded and skilled team working in parallel on a common platform. The paid DaVinci Resolve Studio product includes project server collaboration features which allow several people to work on the same projects at the same time. Instead of large chunks of work being serialized and adding months to the schedule, everyone can work at the same time. (While making effective use of communication and locking features to prevent accidents.) I fully expect we will hear about filmmaking teams this year (2019) that standardize on DaVinci Resolve Studio to radically simplify their workflows and improve their delivery schedules. What do you think? I’d love to hear your thoughts in the comments. Software and Hardware PrerequisitesI’m a Windows person, but I have been using both Windows and Mac with DaVinci Resolve, thanks to the Macs available at RAIS. Quick reminder about keyboard shortcuts between Windows and Mac: Windows Shortcut Mac Shortcut CTRL COMMAND/CMD ALT OPTION Regardless if you are running Resolve on Windows or a Mac, I highly recommend finding a good three button mouse with a middle scroll wheel/button to unlock many time saving mouse shortcuts. For the remainder of this article, I will refer to features as they work on Windows. DaVinci Resolve requires Windows 10. Blackmagic states that they don’t even test on older versions of Windows anymore. Windows 7 is less secure and supports fewer video codecs. Save yourself a bunch of problems and upgrade to Windows 10. Blackmagic has published a Configuration Guide to help with hardware selection. Note that Blackmagic has an unacceptably horrible UI for finding their guides and manuals where you need to visit the Support Center for DaVinci Resolve, then scroll through the list of Latest Support Notes at the bottom of the page. You find the latest software downloads in the same way, by scrolling through the Latest Downloads section at the bottom of the page.  The Blackmagic Web Design team responsible for Manuals and Downloads - they need a paddlin' These downloads and guides are not easy to find directly with Google – likely an SEO decision by Blackmagic – forcing us to go through this horrible web design when we want to download anything. FYI - When you download the Studio version of Resolve, you can bypass registration by clicking the Download Only link on the bottom left. They have no such privacy feature for the free version of Resolve – which is an unacceptably horrible privacy fail and design choice.  The Blackmagic Marketing team deserves an Atomic Wedgie for the privacy fail when downloading DaVinci Resolve I am running Resolve, and recently Resolve Studio on an older PC with 64 GB of DDR3 memory but a new NVIDIA GeForce RTX 2080 GPU. Resolve Studio takes better advantage of the GPU, and has been a huge timesaver for me. You can learn about other differences between Resolve and Resolve Studio in the DaVinci Resolve 15 Feature Comparison Guide. This is an important guide to read, and it is only three pages. Many of the newbie questions about the capabilities of Resolve vs. Studio are answered here. I have encountered some challenges caused by the age of my machine – and discovered a few rendering workarounds that have been helpful. I'll describe these in a future article. Oh, and while we're on the topic of software - I cannot for the life of me understand why DaVinci Resolve is made available as two distinct product downloads - free and Studio. Maintaining two code bases has got to be problematic, and working on a filmmaking team that uses both products is unnecessarily complicated and broken. In my case, I would see effects watermarked in encoded output files rather than simply identified in the UI as unavailable without a license. Moving my project back and forth between school and home computers running the free and Studio versions of Resolve was a huge PITA. Surely this two product approach is no good for the dev team or for customers. It needs to stop.  DaVinci Resolve developers working on two code bases instead of one. Project PrerequisitesThe singular most important thing I have learned about setting up new projects in DaVinci Resolve is to be very thoughtful about the frames-per-second (FPS) choice you make for your timeline. Do not simply default to the FPS of some of your content. Also note that you can only have one FPS for all the timelines in a single project, unlike Adobe Premiere. If you need to deliver to a client in multiple frame-rates, you will need to think through this workflow very carefully. You may need to use another transcoding tool outside of Resolve such as Handbrake to deliver special frame-rate settings. Trying to maintain parallel projects with different frame-rates can quickly become a pain in the ass as you copy or manually recreate all the edit and Fusion decisions between projects. DaVinci also does a horrible job with FPS changes after a project has been started. If you want to create a copy timeline with a new FPS, you will have to edit, color correct, Fusion composite and sound edit everything you did the first time around – the “shortcuts” for doing these things cannot be trusted – and the fastest shortcut for this (importing a DRP with a different framerate) is not offered by Blackmagic. There are no compelling workflows for changing the FPS of a DaVinci project – the only truly dependable way to re-encode the frame-rate is after the full video is encoded. In my case, I made a choice to film my final project in 30 FPS (in hindsight, a bad choice), which in most cameras means 29.97 FPS (a television broadcast standard), even though the menus often simplify this to 30 FPS. When I ingested the media, I allowed it to reset my timeline settings to 29.97 FPS. I should not have done this. Much later, when I needed to create a Digital Cinema Package (DCP) for projection at The Roxy using the Kakadu Motion JPEG 2000 format, the Resolve Deliver page gave me a unique error message that could not be found on the internet. 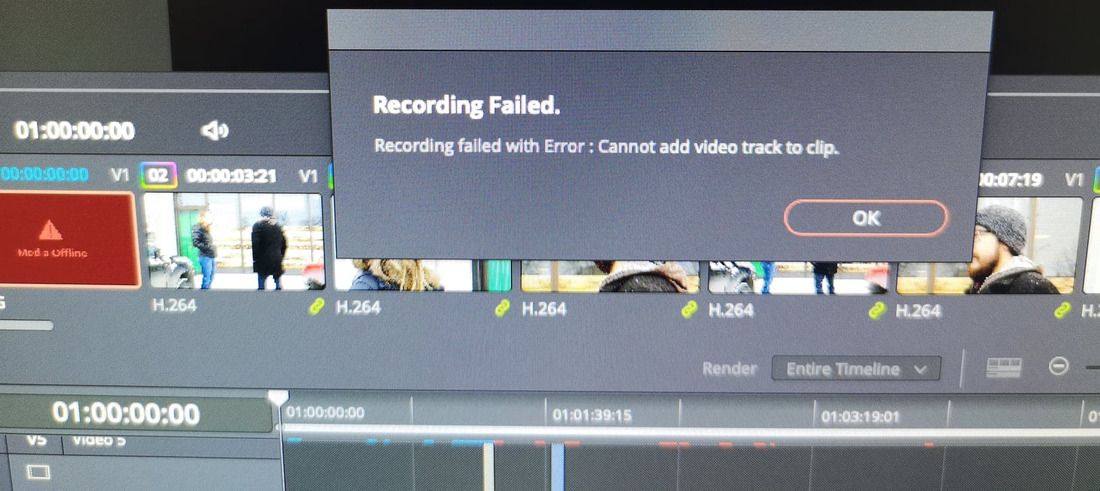 “Recording failed with Error : Cannot add video track to clip.” It turns out Resolve has an undocumented “feature” that it cannot create non-integer DCPs. As a result, I had to use DCP-o-matic, which incidentally is a wonderful tool worth supporting. All of these were great lessons learned for me. I hope you will save lots of time and suffering by noting my experience here. Pro-Tip: Pick a Standard Frame-rate For all ProjectsTaking this FPS lesson one step further, because DaVinci resolve makes it difficult to copy/paste clips, keyframes, and Fusion comps between timelines with different frame-rates, it is a good idea to select one frame-rate that you will usually use, allowing maximum sharing between projects. Say you figure out how to do cool-looking end credits well, it will be easier to copypasta it into your next project. Going forward, I've decided to use 24 FPS as my standard, as I'm interested in producing indie movies. (Although it would be great to make a TV show happen in Saskatoon!) EducationDaVinci Resolve has some of the best educational materials available for filmmakers - and it's free! Blackmagic Design has a 2,600+ page manual for DaVinci Resolve. While I wouldn’t recommend reading it cover to cover, it is a fair resource when you are getting to know specific functionality in the product. Blackmagic Design has a ton of educational materials (books and videos) worth spending time with on their Training Page and YouTube Channel. The books here are more approachable than the manual. Each training class is sizeable and includes project materials so you can follow along. Great starting points worth your time. They have a DaVinci Resolve Forum that is helpful – I’ve learned a ton reading past threads which I’ve found via Google. There are also some very helpful Facebook Groups. Be sure to search Google, YouTube, the Manual, the Forum, and the Facebook Group itself before posting beginner questions to a group. There are so many helpful resources already out there – it is a super useful skill to figure out how to find and use them. Ingesting Numbered PhotosOften, you want to add photos or images to the timeline as still images that appear for a few seconds. The default functionality of Resolve is to merge numerically incremental images into a single ‘video clip’. (I believe this is how RAW clips work.)  Fifteen Images Merged Into One Clip By selecting the three dots at the top right of the Media Storage area while on the Media tab, you can select Show Individual Frames.  Show Individual Frames Media Storage Setting This will allow you to see and copy all of the images individually into your project bins. Also note, you can change the default time duration of an image dropped on the Timeline under the DaVinci Resolve menu, Preferences, User, Editing, General Settings, Standard still duration. I believe the default is 5 seconds. 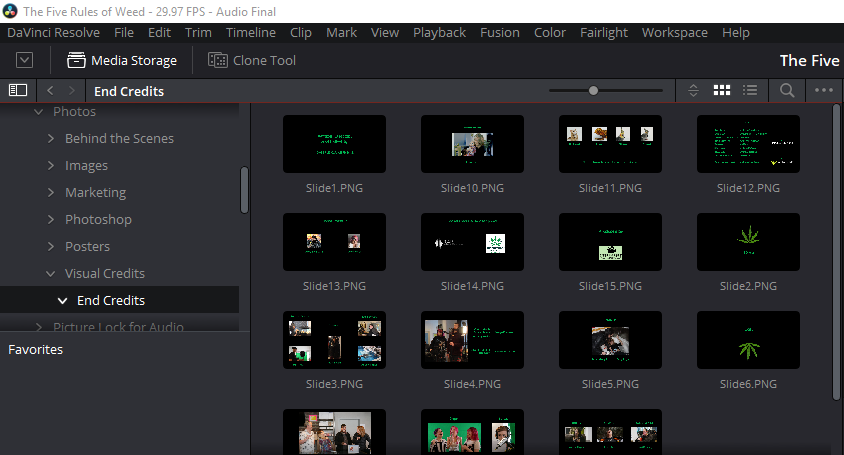 Individual Frames in the Media Storage Area Using the Clone Tool to Ingest MediaThough the UI takes a bit of getting used to, the functionality is very helpful. The Clone Tool will copy files off your media sources (like SD cards and camera hard drives) while verifying accuracy with a checksum. It will also spread media across several target folders if they run out of space. If you want to plug in many camera cards and stack up several jobs to run automatically while you go out for dinner, you can do that too. Start by pressing the Clone Tool button while on the Media tab, then Add Job, then drag and drop source and destination folders into the UI. When you have all your Jobs in place, press Clone. Clip NamingIn a multi-camera shoot with on-location audio and multiple takes, there are lots of files to sift through when you are editing. This gets more complicated when scenes are shot out of order (the usual), and when you shoot parts of a scene on multiple days. If you take a moment to give each audio and video file a Clip Name with some kind of naming standard, it makes editing later much easier. Use copy-paste when renaming to move more quickly. For my latest project, I used a simple “Sxxa – Short scene name – Ty – Shot or Audio purpose – Camera”:
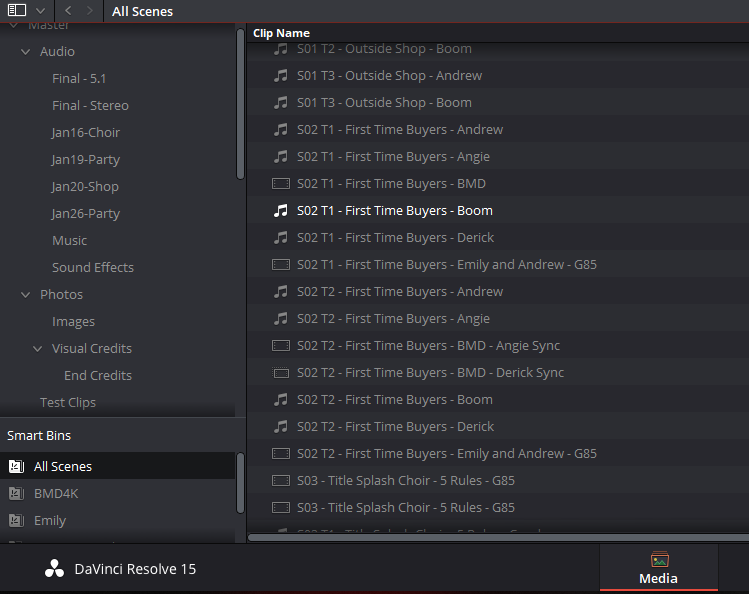 Clip Naming Convention for The Five Rules of Weed I created a Smart Bin of all the media in the project, sorting by Clip Name to find everything I needed for any scene easily. There are much more powerful mechanisms to edit metadata on clips in DaVinci Resolve, which can then be searched and Smart Binned, but for my short film I felt it was overkill. On a larger project, I would spend some time with the team thinking through how metadata can help streamline our collective workflow. Editing UI ControlsThe Edit tab has a collection of buttons across the top that control what you can see in the UI, such as Media Pool, Effects Library, Edit Index, Mixer, Metadata, and Inspector. I recommend getting really used to what these buttons do so you can regularly customize the UI for what you are doing now. For example, I used a smoke clip to introduce various dream sequences in the film. I eventually standardized on a zoom and opacity level I wanted to use consistently. With the Inspector open, I could easily select each clip to verify it was configured as intended. If the clip was misconfigured, use the Paste Attributes… command (right-click a clip after copying another) to quickly copy the same settings from clip to clip. My favorite UI keyboard shortcuts for controlling the UI are:
Editing BasicsLearn to use Spacebar and the JKL keys for playback control. Learn to use In-Out points (with the I and O keys) on media clips, plus the video/audio only hover-selectors so you can drag only what you want on to your timeline. Learn how to Blade (B key) and use Trim Edit (T key). Trim edit is a great way to control exactly what is showing on the start and end frame of a clip on the timeline. Learn how to set markers (M key) on a selected clip or on the timeline. I will often listen to the music on the timeline while pressing the M key for each beat, then edit video clips to the beats of the music. Use the D key to disable/enable a selected clip. Unlink your audio from video and learn how to create J-Cuts and L-Cuts. Learn to use Undo (CTRL-Z), Redo (CTRL-SHIFT-Z), and History commands on the Edit menu to fix accidents. You can create a Timeline containing other Timelines - cool! Three Point Editing and Copy PasteOne of the most common questions from people new to Resolve is how copy/paste works. It is a bit non-intuitive for people new to a non-linear editing (NLE) system. You can use copy/paste shortcuts like CTRL-C and CTRL-V, but paste is affected by Auto Select controls, Locked Tracks, Disabled Tracks, and In-Out markers. It's a complex topic. If something doesn’t seem to be behaving intuitively, check all of these things. Clear In-Out markers on the Timeline with the ALT-X shortcut when paste behaves oddly. My favorite way to copy/paste is to ALT-Select one or more clips and drag a copy to a new location. My favorite way to replace a clip is to select the clip, press X to set In-Out points around it, highlight the new clip I want to use in the Media Pool (setting In-Out points on it as well), and press F11 (Replace Clip). Afterwards, press ALT-X to remove the In-Out points on the timeline, otherwise future pastes will go there too. I highly recommend reading Chapter 22 Modifying Clips in the Timeline in the manual and watching the Blackmagic Design Editing training video. The edit UI is deep and powerful, and there are too many tips and tricks to cover here. Basic Sound EditingFairlight is a powerful tool for managing your audio tracks, busses, and main outputs such as Stereo or 5.1 Surround Sound. However, I've find it useful to do some basic sound work while in the Edit tab. For example, reviewing the sound levels of vocals, sound effects, and music is easy to do using the Mixer. For a nice overview of target sound levels see this article. After I’ve placed all audio and video I think I’ll want to use on a timeline I’ll use the Normalize Audio Levels… command against multiple vocal clips with a value of -12 (with ‘independent selection’ checked) to put all of my vocal clips in a similar range. Resolve looks at the maximum volume level of the clips selected and reduces the volume of each clip to make your chosen volume level the highest level of each clip. You can see the volume level selected (and change it) using the Inspector. This is a nice starting point, but then you’ll want to go through each audio track and boost or reduce specific spoken phrases. With Audio Waveforms showing on the timeline, zoom into an audio clip so you can see the waveform. Make the audio track taller. Use ALT-Click to add keyframes on the audio clip volume line. Put two keyframes close together. Drag the volume levels between keyframe pairs to change the volume of that part of the waveform. 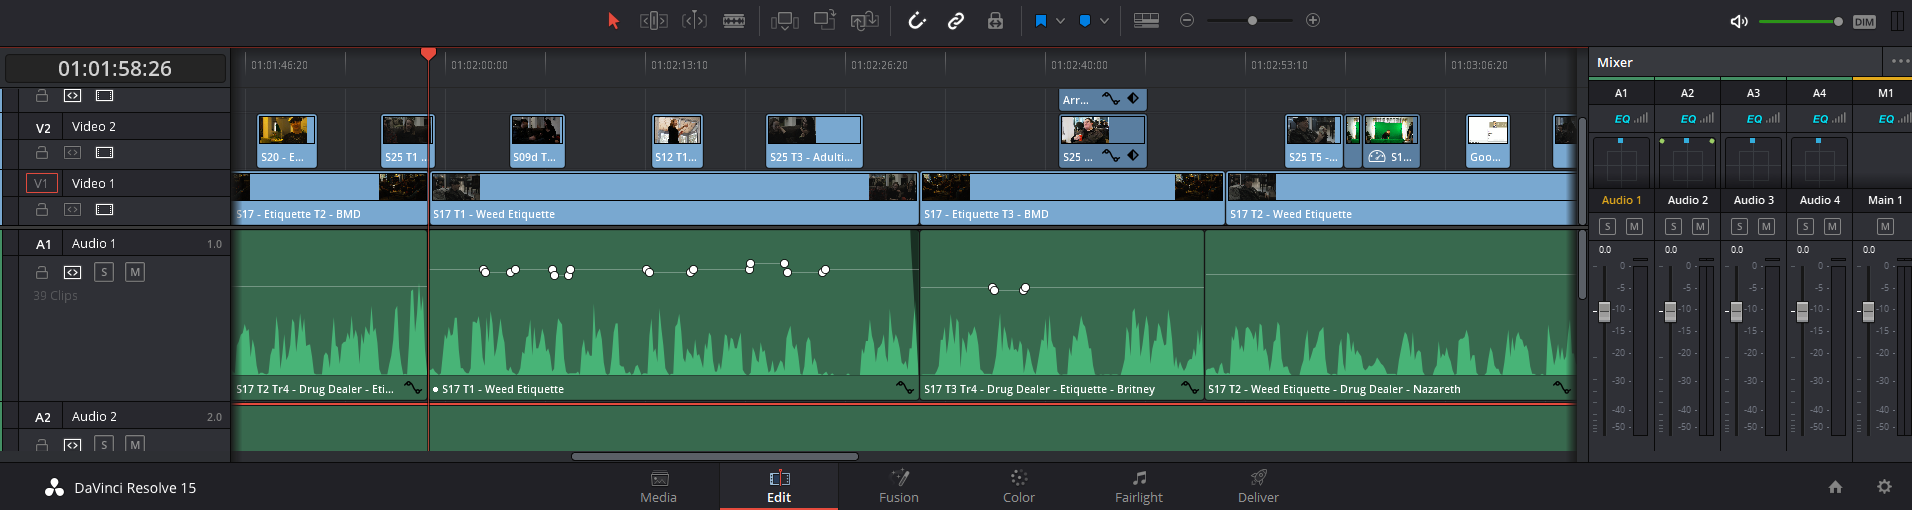 Using Keyframes to Control Dialog Volume Levels in Audio Clips Watch the height of each part of the waveform, looking for some level of volume consistency. Then, listen to your work while watching the Mixer, to ensure your vocals are in the comfortable-to-listen-to -12 to -15 range. This technique can be used for sound effects and music too - with different target volume ranges. Auto Audio Sync DaVinci Resolve has rudimentary Auto Sync Audio capability built in, but it has some serious limitations. If you select a video clip containing audio and another audio clip, this command can replace the embedded audio with linked audio. This allows you to use a cleaner audio signal recorded on set than the microphones built into the camera, which usually contain distracting machine noise from the camera. Some limitations I’ve noticed:
Because of all of this, you end up getting good at lining up multiple audio sources using visual and waveform cues, such as a spiky clapperboard snap. It’s not perfect, and it’s a huge pain in the ass when you are dealing with many audio sources (such as actor lav mics) in a shot. My lesson learned here – always record the clapperboard snap on camera, and always record audio on the camera to sync with later. Some cameras can take in a clean audio signal from an on-set microphone without mucking it up with hardware noise – if you have this type of camera take full advantage to save some time in post. ConclusionIn my short time using DaVinci Resolve so far, I’ve found it to be a powerful and deep product that can do just about everything an indie filmmaking team would want; admittedly from my own beginner’s perspective. It has a few unfortunate limitations – but it also provides huge value and workflow simplicity.
There are tons of free educational resources to learn from – that go from beginning tips to the most advanced techniques. Putting training content in a 2,600 page PDF manual is about the worst way to do things – but it’s a start. Hopefully Blackmagic will take a cue from every other software company and start publishing educational tidbits by scenario in an easily linkable and discussable web format. Telling people to check out page 1,647 of the manual as it existed on May 15, 2018 is just about the worst possible way to encourage learning and knowledge sharing online. For a free product, DaVinci Resolve is surprisingly powerful and useful across many aspects of post-production. I haven’t even talked about the Fusion, Fairlight, and Color tabs yet – holy cow they rock. Titles and credits are super-easy, green screen effects work well, and color grading by groups is very powerful. Most importantly, Blackmagic has shown a strong commitment to releasing regular updates to DaVinci Resolve – every month it gets better and better. This corporate commitment to improvement is IMHO the most compelling aspect for making a career commitment to learning and using DaVinci Resolve.
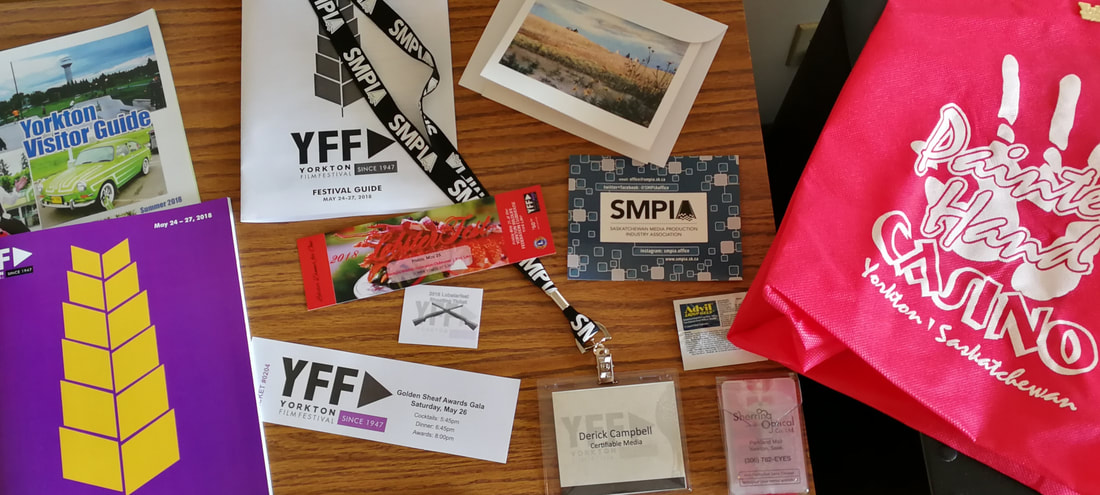
I was excited about attending YFF, my first film festival in our province of Saskatchewan.
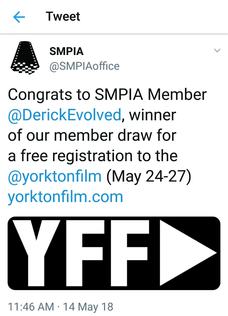
Just as I was about to purchase my ticket, the Saskatchewan Media Production Industry Association (SMPIA) reached out to let me know I had won a free ticket in their draw. Fantastic! I've been super lucky lately. SMPIA is a wonderful organization - I've met others in the industry through their networking events and attended great training events organized and hosted by SMPIA. Their regular newsletter keeps me informed of important events and updates. And now this - thanks SMPIA! In the Vancouver festival I attended I focused on skills development. At YFF I decided to focus on making connections with people in our industry while watching as many good films as I could. I wanted to learn about the talented people we have close to home. IMHO filmmaking is all about teamwork; it was time to meet people that would be good to work with. Ok, let's talk about some of the best films shown at Yorkton this year! (Note: any and all of the great films missing from my lists below are my fault alone. Apologies to the great YFF films I haven't seen or mentioned yet.) The Golden Sheaf Awards The Golden Sheaf Awards at Yorkton are inspired by the beautiful fields of wheat you'll see on the drive to the festival. Identifying award winners is a huge commitment involving over 70 jurors set up in cities from coast to coast across Canada. All of the nominees and award winners from YFF are online here - so many great films. My personal picks are captured below. Huge kudos to Lisa Peters, the host of the 2018 awards gala, for an entertaining and memorable evening! Lisa was smart, funny, and we absolutely loved the selection of outfits. Must See Indigenous Films As a returning Canadian who lived in the US for several years, I missed out on much of the truth and reconciliation lessons and news as it happened. For example, I never knew about residential schools when I lived in Canada previously, even though they were happening at the same time I was going to school here. The last residential school closed in 1996, after I had already graduated from university! There are people in our country my age and younger who were forcibly isolated from their families and culture, suffered emotional, physical and sexual abuse and neglect at the hands of our government and religious organizations. This is horrifying; clearly the impact of this will be far reaching into our future. Residential schools aren't the only grievance. Villages and townsites established for indigenous people were specifically chosen because they were far away from "white people towns". Today, these distant locations continue to have challenges with water quality, goods and services availability, and a serious digital divide (internet access - a crucial resource for skills and knowledge development, communications, etc.). The historical choices I've learned we made as a country have rocked me to my core. This is my Canada? I want to be proud of my country; but should we be, knowing all this? How does a country atone for this level of savagery? I have a personal mission to learn the stories of my fellow Canadians who have not had the positive experiences growing up that I did. I want to learn, I want to help. The Yorkton Film Festival brought some excellent stories of honesty, courage, and hope. Here are my top four indigenous films from the festival that I highly recommend. Run As One: The Journey of the Front Runners Directed by Erica Daniels, whom I had the pleasure of sitting with at the YFF awards, Run As One does a wonderful job of telling the story of a team of indigenous athletes who helped carry the torch to the Pan American Games in 1967, as Canada celebrated its 100th birthday. This film does such a great job of taking the viewer through a wide range of emotions as experienced by the athletes. Both funny and moving, Run As One is as enjoyable as it is educational. Erica shared with me that she brought her daughter with her to the awards, as she had been pregnant with her all through filming and thought it fitting that she attend the awards show as well. Everyone was thrilled with this decision, as her daughter stole the show by gnawing on Erica's Golden Sheaf Award while attempting to give her acceptance speech. Click this link to watch Run As One: The Journey of the Front Runners on CBC Shortdocs. You'll be glad you did! Rumble: The Indians Who Rocked The World Indigenous people have had a profound impact on the music of today - but this story has largely gone untold. Rumble does a fantastic job of introducing key influencers in the history of rock, blues, and folk. If you love music or fascinating stories well-told, you'll quite enjoy this movie. Rumble on Rotten Tomatoes (a 100m movie) has links to viewing sites. To Wake Up the Nakota Language There are only a handful of Nakota speakers left in Saskatchewan. This short film shares what the community is doing to preserve it. I met director Louise BigEagle at the YFF opening night screening, and learned how she came across this cool story. I asked if the Nakota language has a written form, and mentioned Microsoft Translator Hub (which I supported at Microsoft Research), a community-driven resource for building language translations. This endearing, 6 minute film is a wonderful story about an endangered language and what the community is doing to save it. Holy Angels An eye opening account of what life was like in a residential school, Holy Angels shares an important perspective - the view of a child. More information about Holy Angels on the NFB site. Must See Dramatic Films I took full advantage of the screening room at YFF to watch a ton of film. These are my favorite dramatic films from the festival. Skin for Skin I met Skin for Skin producer Carol Beecher and director Kevin D.A. Kurytnik at the Friday night Lobsterfest. Really nice people - genuinely interested in others, they asked about what I'm working on and shared several good ideas. I asked about how they made Skin for Skin, and Kevin explained that one of the things they needed to do was get the animators trained in Maya so they could achieve the look they were going for. Bravo for their choices here, this animated film is beautiful and has a very unique style that is a joy to watch. I was thrilled this film won two awards, for Animation and Best of Fest. I was talking with Steve Bates of Telefilm Canada at the beginning of the awards night when I mentioned that Skin for Skin would absolutely win an award. I didn't know it then, but he would be the one announcing the winner of the animation category. Later, when he opened the secret envelope, it was Skin for Skin. Called it! I suspect Skin for Skin will be available from the NFB site when released. If you get a chance to watch this film, please do! Must watch in my books. Must Kill Karl YFF winner of the Comedy category, Must Kill Karl is a delightful 12m film about that one friend we all can't stand. The actor that plays Karl, Mike Lobel, does an amazing job. Turns out you are very lucky - this film is online now and available to watch! Must Kill Karl on CBC Reflections. Adult themes. Game I met director Joy Webster after the awards ceremony, chatting with other award winners. Joy won the Emerging Filmmaker award, and you can see why after watching Game. It is a gripping story about two young siblings largely left to fend for themselves. The trailer for Game is online here. The Undertaker’s Son Winner of the YFF Drama category, The Undertaker's Son is a quick, compelling story taken from a point of view one rarely sees or understands - giving a fresh perspective on an age old career. The trailer is on the producer's site, Foreshadow Films. While searching, I came across a real gem from the same production company, Soggy Flakes (5m animated film). Such a treat! Mustard Seed This gripping short film won the Student Production category, and it is easy to see why. This story grabs you from the beginning and takes you on an emotional roller coaster. I met director Lina Roessler in the beverage line at Lobsterfest., where I shared with her all of the positive reviews I had heard about Mustard Seed. Lina is a talent to watch. While writing this article, I'm realizing that Lina was on Lost Girls, one of my favorite Canadian TV shows. I'm fangirling here - huge missed opportunity; I could have asked Lina all kinds of questions about that show. :) Watch the trailer for Mustard Seed here. Must See Documentaries IMHO, films should entertain first and only if successful at that, perhaps educate too. These four great documentaries all meet my personal high bar for both entertaining and educating. Talking At Night Winner of the Best of Saskatchewan Award, Talking At Night gives us a peek into the operations of the Saskatoon Crisis Intervention Service, which provides 24-hour crisis resolution to people in distress. What I loved about this short doc was the intensity you feel while watching it. Hearing call takers help people in difficult situations. The percussive heart beat of the phones ringing all night long. This doc will help bring attention to an increasingly important service. I met director Eric Thiessen right after the opening night screening, where I asked about how they made the film so intense. He shared one approach they used, mapping scenes and sounds onto a soundtrack that isn't heard, which gives the movie a musical feel. He shared a story about two of the service's call takers watching the film and commenting on how well it makes you feel like you are there -- it even made them anxious about returning. Powerful drama. I asked Eric about what he is working on next, and it sounds ingenious! No spoilers though, you'll have to wait until this film is released. Watch a clip and interview about Talking At Night here. Bridging Borders Bridging Borders is a TV series from City Saskatchewan that tells the stories of new refugees to Canada and the families that have helped them. My wife and I have been watching this series, and we love it! Seeing the passion and drive of ordinary Canadians who want to help, and how new neighbours meet and overcome the challenges of moving your family across the world, learning a new language, finding work, and fitting in to a new community. I met director Colin McNeil over drinks after the awards show, in a large after-party hotel room. (Which was awesome, and packed, and noisy, and boozy.) He was disappointed they didn't win an award, but excited that we enjoyed the show so much. I previously met one of the show's producers, Christopher Triffo from Wavelength Entertainment in Regina. Christopher taught at the SMPIA Producer's Workshop I attended, and I ran into him again at Yorkton. I thanked him for the great training and we talked about some interesting producer situations. Speaking of SMPIA connections related to Bridging Borders, another great instructor from the same event, Will Dixon of City Saskatchewan, was also at Yorkton. He focused on the art of pitching and gave us great ideas and approaches to consider, often by sharing stories of his own pitching successes and failures. It was great catching up with Will. Anyway, all of these cool, interesting people related to Bridging Borders were at YFF - it was great to see and chat with them! The first four episodes of Bridging Borders are available to watch online. Guaranteed you won't be able to just want one - they're addictive. Howland’s Honey I had no idea how interesting the production of honey could bee -- this short doc from Bamboo Shoots was entertaining and amazingly informative. Howland's Honey won the award for Community Television Production. I met the two main people/actors in the doc at the awards show, and thanked them for a great informative film. They were pleased - this is exactly what they were going for, raising awareness about honey production. Watch the trailer here, full show available from SaskTel maxTV Local on Demand. Under The Radar This is a very cool and uniquely Canadian story – told with passion, humour, and helpful visuals. A small team of Canadians racing against time (and NASA) to transform satellite radar results into viewable images, with the computing capability found in today's pocket calculators. Watch Under The Radar (10 mins) here! Did You Know: YFF is the Longest Running Film Festival in North America I had a blast in Yorkton, met tons of interesting filmmakers, watched several great films, and enjoyed the local hospitality (and lobster). I found the festival to be motivating, inspiring, and a great celebration of Canadian talent. I definitely plan on attending again. Thanks again SMPIA for the ticket, and many thanks to the board and volunteers of YFF for putting on a wonderful event! - Derick
I attended the Vancouver Web Fest (VFW) in April with the primary goal of learning as much as possible from the panels and speakers. As a new producer, I "don't know what I don't know" and wanted to take everything in with an open mind. Here are the most interesting tidbits I picked up from the festival. Meet Canada's Funders 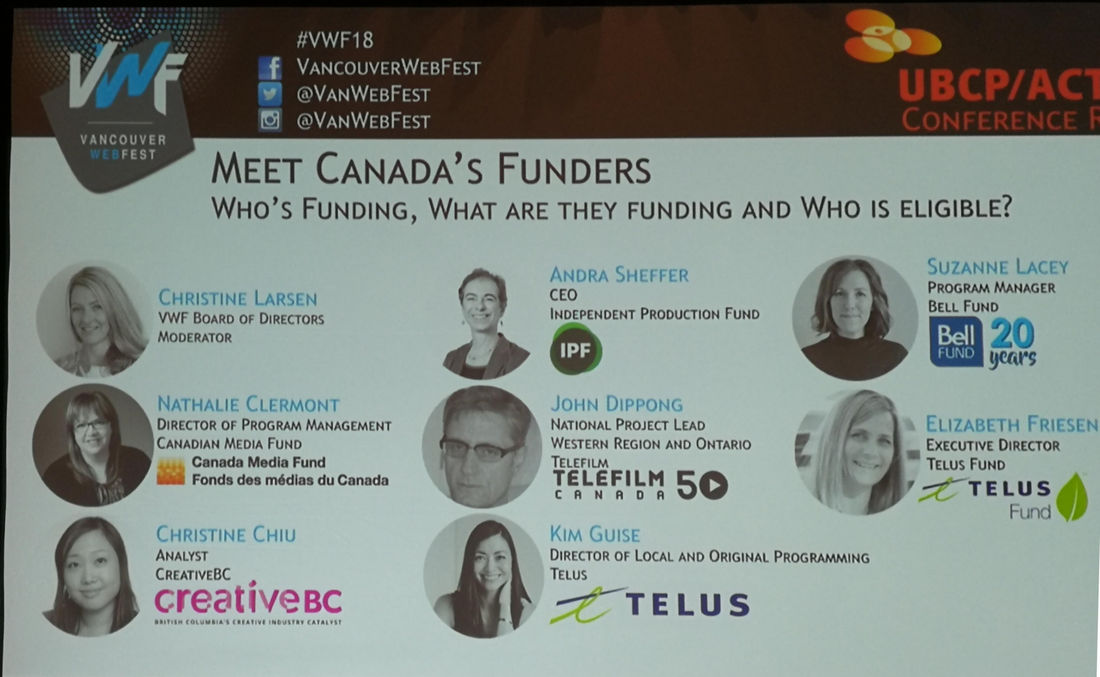 Meet Canada’s Funders: Who's funding, what are they funding and who is eligible The first panel of the festival was a whirlwind tour of a variety of film funding programs available. Here's the list of funders who participated (that we in Saskatchewan are interested in), with direct links to their funding programs:
Social Media, How To Build An Audience For Your Personal Brand 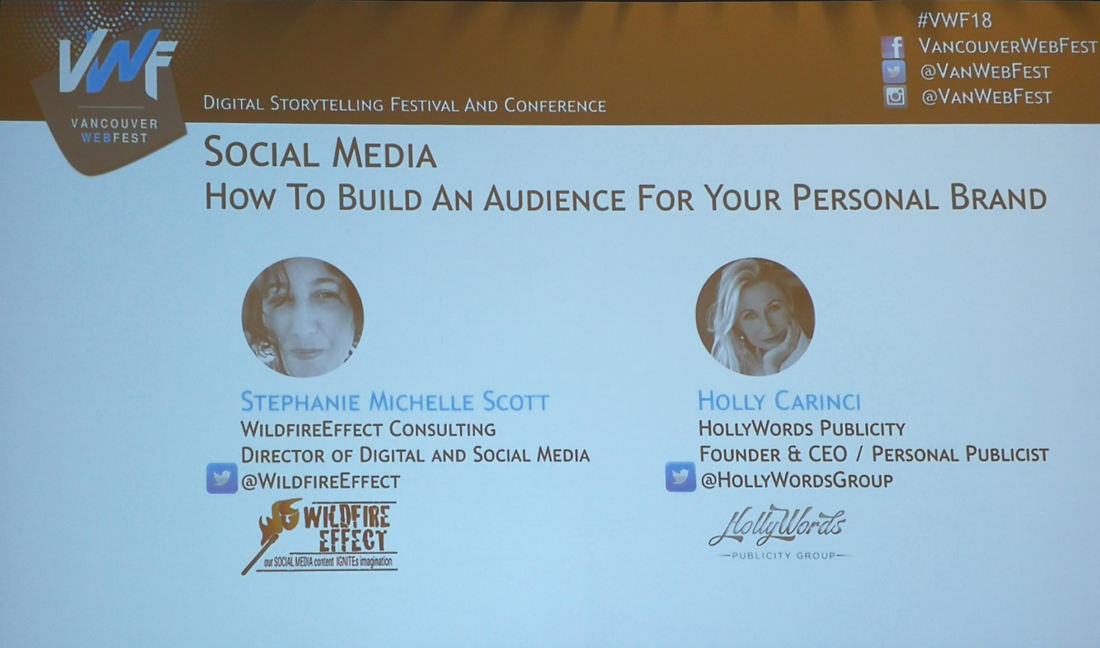 Social Media, How To Build An Audience For Your Personal Brand Here are the most interesting tips I picked up from the Social Media session:
Working with Professional Performers, How and Why? The Professional Performers panel discussed how working with unions and professionals can have a positive effect on your production:
How to Craft a Successful Pitch This pitching panel included successful film pitchers and industry execs that hear pitches every day:
How to Run a Successful Crowdfunding Campaign The crowdfunding workshop led by Ben Dobyns, an executive producer and director for Zombie Orpheus Entertainment, was my favorite session of the festival:
All in all, VWF was a fantastic festival for me - I learned a ton and had a great time. I will be back. - Derick People often ask about the name Certifiable Media. Does it have some special meaning? Why yes, it does. Moving to Saskatoon from Los Angeles and starting a film business in the Canadian Prairies instead of continuing a 30 year career in high tech - who would do that? Seems a little, I don't know, crazy. Saskatoon is Wonderful I love Saskatoon. It's a beautiful city with wonderful qualities. The air is fresh and clean - a serious challenge for bigger cities. The landscape is beautiful, with sunny skies throughout the year (an average 2,381 hours of sunshine every year). The province is filled with lakes and amazing parks and views. The prices of homes are very reasonable (compared with the bigger cities we've lived in like L.A., Seattle, and Toronto). The dream of home ownership is more achievable in Saskatoon. It is quite common for young families or adults in their 20s to purchase a home in Saskatoon and grow their own equity vs. spend their income on rent. In L.A., it was very rare for the younger adults I worked with to even consider home ownership. I have to imagine Toronto and Seattle are similar these days with skyrocketing real estate costs. Just about any destination in Saskatoon is within a "two song commute" as our mayor Charlie Clark would say. My commutes in Toronto and L.A were 40-60 minutes each way, and I worked with people commuting 90-120 minutes each way so they could afford to live in areas with great schools. Spending that much time on the road is a huge family commitment, and public transit while helpful comes with trade-offs. There's quality theater, music, comedy, sports, and cultural events - easily accessed with a quick drive and plenty of reasonably priced parking. In Toronto and L.A., travel time and planning where to park are crucial considerations when attending events. This convenience has a huge impact on how many cultural events we've enjoyed here. From racing to Spamalot to Husky football or An Evening with Michelle Obama -- there is always something thrilling to do in Saskatoon. The restaurants here are surprisingly good, with many exciting foods to try - several influenced by greek and ukrainian cultures. For example, there is a perogy drive-thru here. Personally, I have fallen in love with the dry ribs from Kisavos - do not miss out on these. The deli and sausage selections in our grocery stores are the best I've seen of any place I've lived. All of this plus tons of family right here in town has made moving to Saskatoon a wonderful choice for us. It's a Dry Cold I never understood this statement before moving to Saskatoon. Living in Toronto for the winter was usually a slushy wet mess. Wet gloves and boots plus cold = a miserable time. Sure Toronto is a bit warmer, but it is often grey and slushy in the winter. Saskatoon winters bring different challenges. -30C degree weather, for a few days at least. Nights and days that alternate between freezing and thawing, creating one big ice rink, the size of a city. Tire ruts on snowy roads become permanent fixtures near impossible to turn from. My wife laughs at me for purposefully driving outside tire lanes in the snow to prevent tire ruts on our favorite roads. Snow tire decisions plus storing your summer tires. Blowing out sprinkler systems. Winterizing a summer cottage. These are all issues we did not have to deal with living in Washington or California. Once, I turned on the outside water to fill up our hot tub, forgetting the sprinklers were open and flooding the street. The flood froze, creating addition icy chaos for our neighbours. I was quite popular. At the same time, winter in Saskatoon brings a special beauty, and special events. Frozen lakes end up occupied by a variety of vehicles, sleds, and RVs hosting ice fishing. Crokicurl, invented in Winnipeg, appeared in Saskatoon this past winter. Snowball fights of epic proportions. Families visiting over coffee and hot chocolate around cozy fireplaces. And when we're really lucky, between thawing rain and freezing weather, the trees look like gigantic snowflakes.
Crazy, Eh?
Moving to Saskatoon and starting a film business may sound crazy, but for us it's been the best decision. In future posts I'll explain the types of film we plan to make, share tips, give project updates, and share information about industry events and films happening in the Canadian prairies. If you want to follow along, visit Certifiable Media on Facebook. Are you a fellow filmmaker in the prairies? Visit our Contact page and say hi! We're very interested in meeting talented people in the industry and collaborating on projects. - Derick |